
In Part 1 of this series, we described the preparations for departure and the decisions we had to make regarding COVID-19, such whether to go at all. SPOILER ALERT: Yes, we did decide to go. 🙂
In this part, we complete the first leg of our journey to Florida.
Trip Planning
Every camping trip involves driving somewhere. Our trip to Florida takes about 21 hours of driving, so we have to break the trip into several days. In general, we like our driving days to be under 700 km (430 miles). That’s the reliable range of our truck when it’s pulling the trailer. That means that we can avoid stopping at truck stops for diesel fuel. Also, that distance typically works out to about seven hours of driving, which is about as long as we like to be on the road for a single day. Towing the trailer is a bit more demanding than just driving a car, so we don’t like to do longer days like we might in a car.
Also, our camping trips are vacations for us. Because we’re retired, we can make our vacations almost as long as we like. So, there’s no need to rush to our destination. Instead, we often spend two nights at each intermediate destination just to make the drive more relaxing. On those stops we like to do a bit of hiking or cycling to make it more fun. In the winter, though, we’ll do two straight days of driving just to get out of the cold.
Journey to Pennsylvania
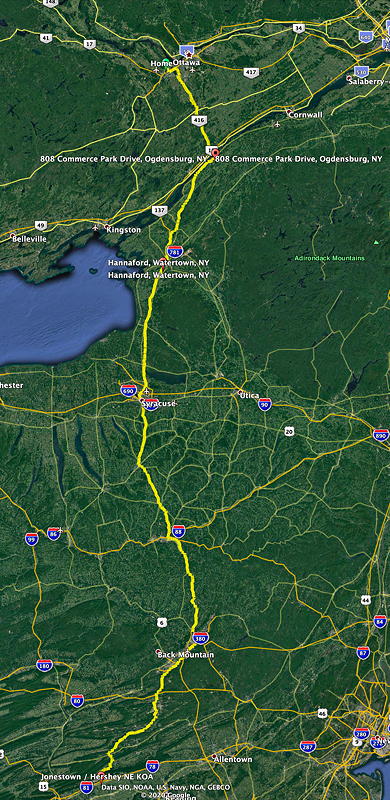
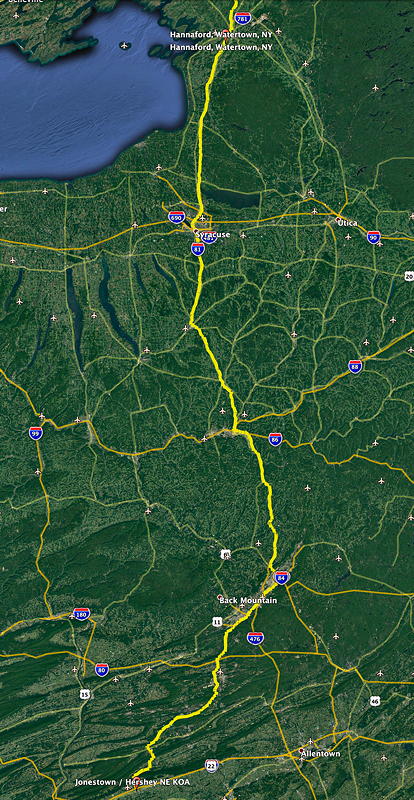
The first leg of this trip was to the Jonestown / Hershey NE KOA campground in Pennsylvania. It is, we believe, the closest open-year-round KOA campground on the journey to Florida. At about 670 km (410 miles) driving distance, it’s just within the range of our truck without refuelling. That works out to about seven hours of driving for us to get there. We also typically stop several times on the way. That adds another half-hour to an hour to the drive. For that reason, we’d prefer a campground that was a little bit closer–we’re usually on our way late in the morning due to last-minute packing. That late morning departure combined with seven hours of driving makes for a long day. But, it’s the closest KOA we can find that’s open in the winter, so we just prepare ourselves for the long first day.
Ogdensburg and X-Rays
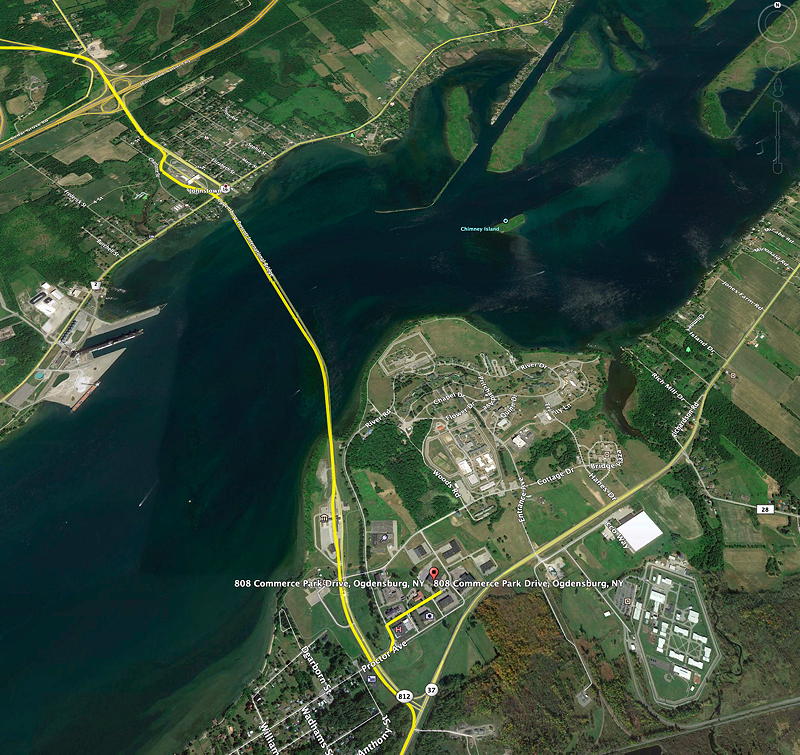
Our first stop, though, was the Canada/USA border at Ogdensburg, NY. We chose that crossing because we often order packages from amazon.com and have them delivered to MyUSaddress.ca in Ogdensburg. In this case, I had two packages to pick up. By picking them up on this trip, I can take advantage of the import exemptions. They allow us to avoid paying duties and taxes on the packages when we return to Canada after stays of more than two days in the USA.
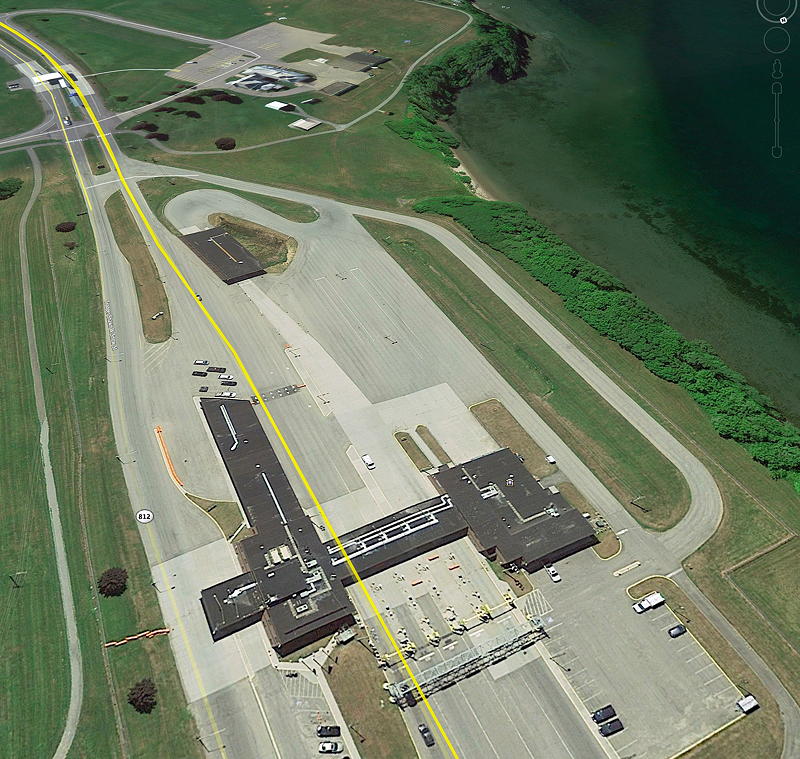
The picture below shows both the Canadian side of the border, in the upper part of the picture to the north of the St. Lawrence river, while the USA side of the border is to the south of the river.
The USA Border Crossing
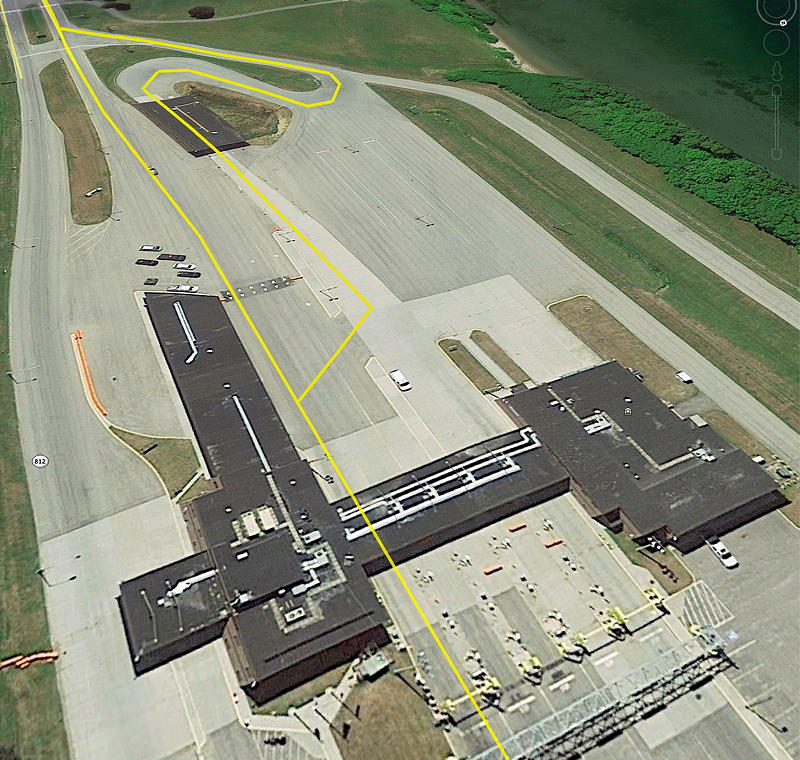
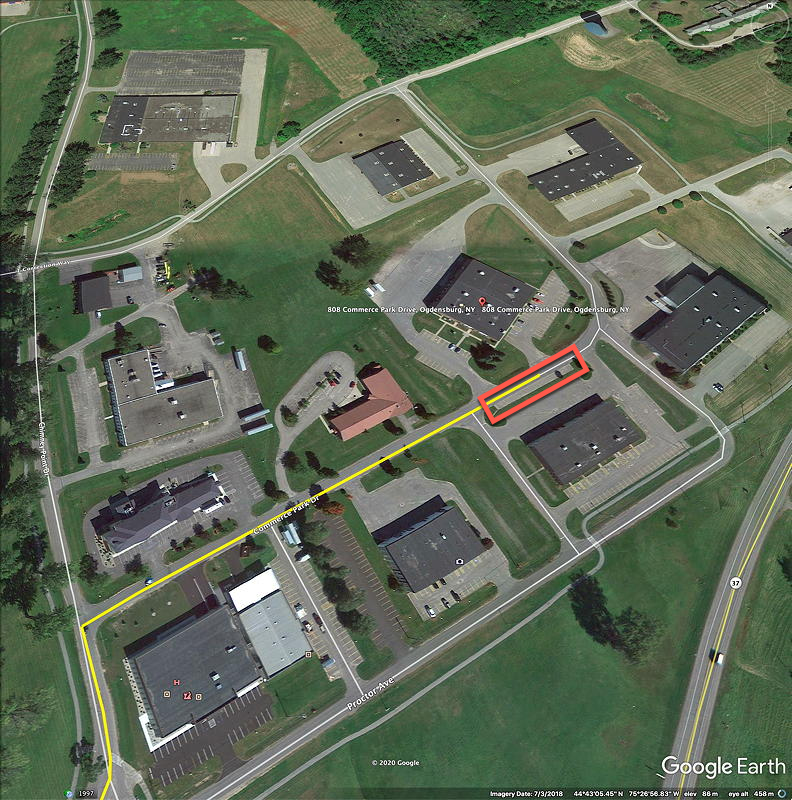
The picture below shows the border crossing area as well as the My US Address warehouse where we were to pick up my two packages. The USA border crossing area is indicated by the large rectangle at the upper left of the picture. The X-Ray building is indicated by the smaller red rectangle inside the larger one. The red rectangle below the border crossing area shows the toll booth where you pay for crossing the bridge. For us, pulling the trailer, we pay a lot more than cars at USD$10.25. The My US Address warehouse is just above the red rectangle on the right of the picture. The rectangle shows where we park at the warehouse.
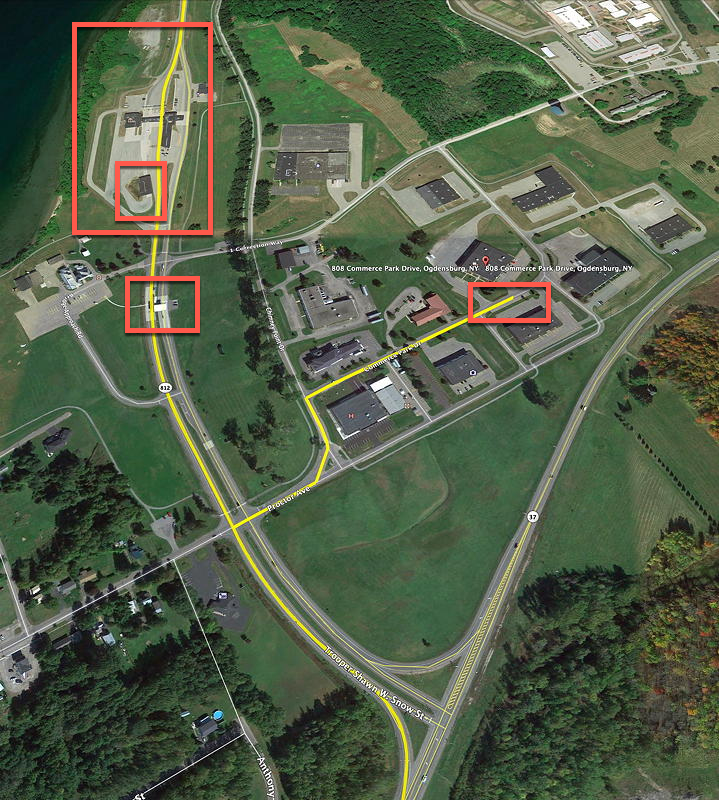
When we arrived at the border crossing, there were a few more vehicles than usual in front of us, perhaps ten or so. There was a fifth-wheel trailer ahead of us. We were both surprised when it was directed to another building just ahead and to the right of the border agent. A truck that was also ahead of us also went to that other building. This other building is about one-third down from the top of the picture below.
Our Turn!
Finally, it’s our turn!. The border guard was polite and pleasant, asking us the usual questions. He asked no questions related to COVID-19. In fact, no health questions at all. Then, even more to our surprise, he mentioned that they were going to do thing a bit differently than usual. He directed us, too, towards that other building. Apparently, our truck and trailer would be subject to X-rays. We drove to the building where we waited behind another truck. The fifth-wheel trailer left shortly and the truck in front of us entered the building. After the scanning, the truck left.
X-Rays
Next, we entered the building. We pulled ahead until signalled to stop. Then, the operator directed us to a booth, presumably lead-lined, at the front left of the building. The operator’s station was at the front right of the building. Next, our truck and trailer were scanned. A machine started at one end of our rig and slowly progressed to the other end of our rig. It took a couple of minutes and then it was done.
The operator waved us to get back in the truck. As we headed to the truck, I pointed to my iPhone and asked if I could take pictures. He vigorously shook his head and said, “No”. So, I have no pictures of that fascinating building. I tried.
The Missing Building in Google Streetview
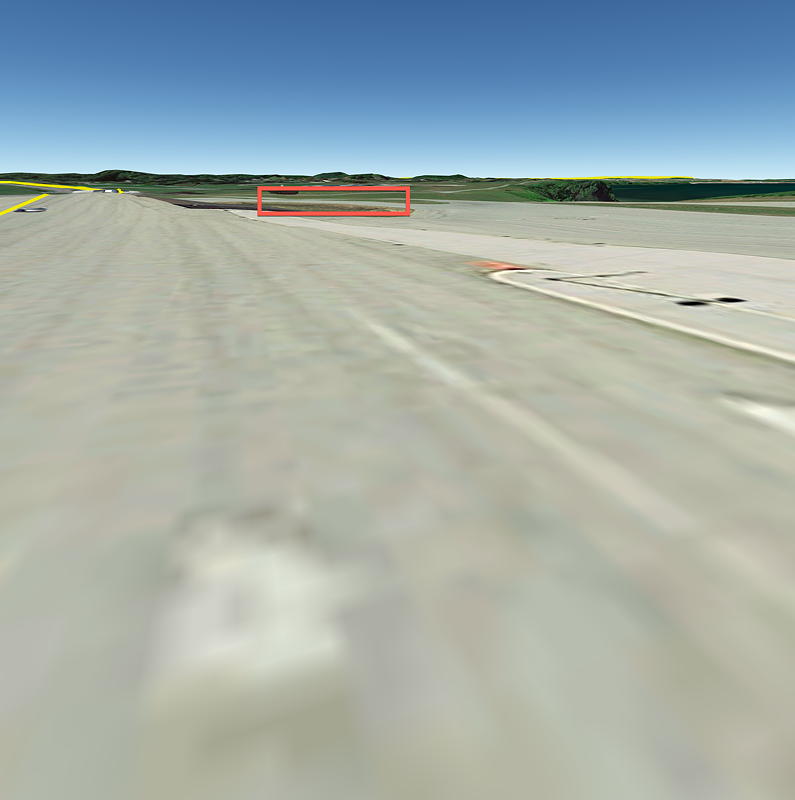
When I used Google Earth Pro to create the maps in this posting, it dawned on me that I could use Street View to show the building from eye level. As you can see below, Google effectively “erased” the building. The red rectangle shows, roughly, the part of the road that is actually enclosed by the X-Ray building. I guess it’s considered a security risk so Google hid it.
My US Address
After our X-Ray experience, we went to the My US Address warehouse to pick up my two packages. They have a nice parking lot for customers out front. However, it’s not big enough for us to turn around in with the trailer attached. If we did enter the parking lot, we’d have to back out the way we came in, and that’s a real pain. Fortunately, there’s a long parking spot across the street from the warehouse. We’ve never seen anyone parked there so we assume it’s an overflow parking spot. It’s long enough for about two of our rigs to fit, so it’s very convenient for us.
Watertown
Our next stop was in Watertown, New York, arriving just before 3:00 pm. This is a routine stop for us. We usually visit the Hannaford grocery store to pick up a couple of pre-made sandwich wraps for lunch and stock up on groceries for the next few days of our trip. Also, we have a Verizon Jetpack MiFi 8800L hotspot that we use on a prepaid plan to get 30GB of high-speed data for 30 days. If we use up the high-speed data, we’re stuck with low-speed data. However, the low-speed data can be faster than the WiFi at some campgrounds. We picked up the necessary $70 Verizon refill card for the hotspot at Hannaford, too.
Hannaford Grocery Store
The Hannaford grocery store is right off of I-81, as you can see in the picture below. That makes it a very convenient stop for us with very little time lost. Although the yellow route line tracks around to the back of the grocery store, we park in the front.

Here, you can see where we parked at the Hannaford grocery store. We’re off to the side of the store where there’s nobody parked. That way, we don’t interfere with anyone else.
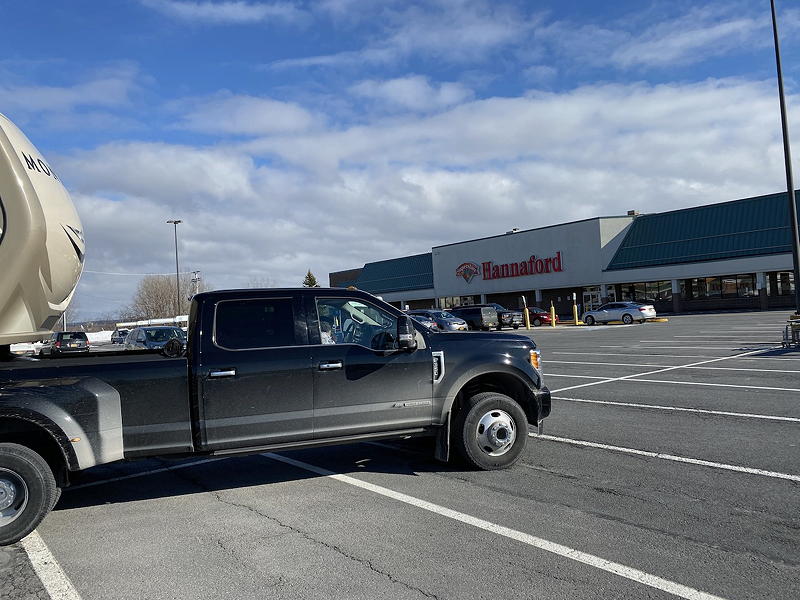
Everything in the store was normal. It’s March 5th and there is no indication that COVID-19 is affecting anyone’s behaviour yet. Even we were feeling pretty relaxed about it at the time. We’d decided to go on the trip based on the low probability of us encountering it. We simply weren’t worrying about it yet.
The Jonestown / Hershey NE KOA Campground
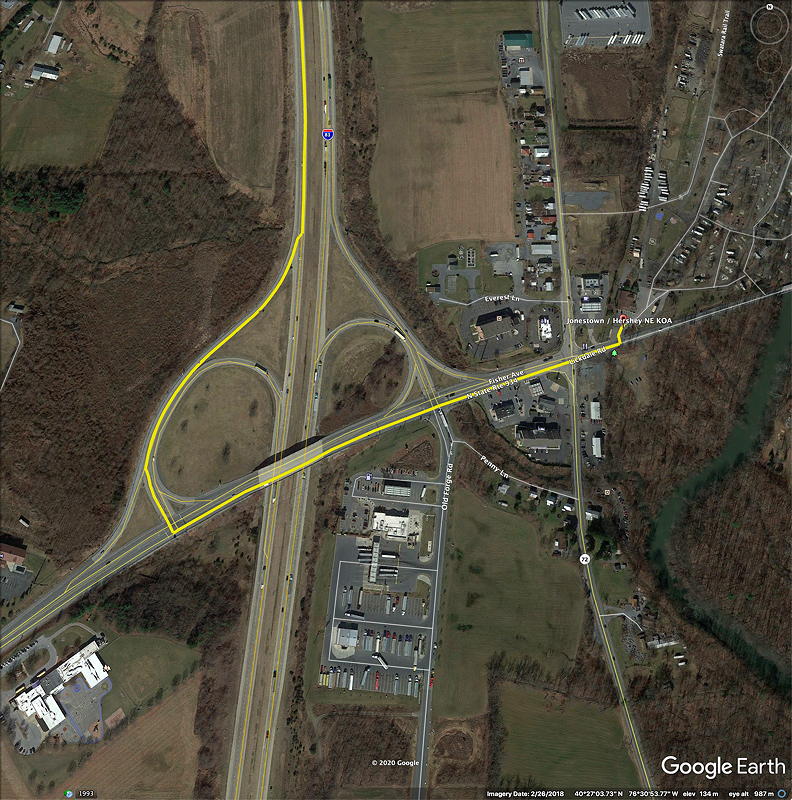
The next major stop for us was the Jonestown / Hershey NE KOA campground. It’s a fairly straightforward route from the Hannaford grocery store in Watertown, New York. We simply got back on I-81 South and then got off at the exit for the campground.
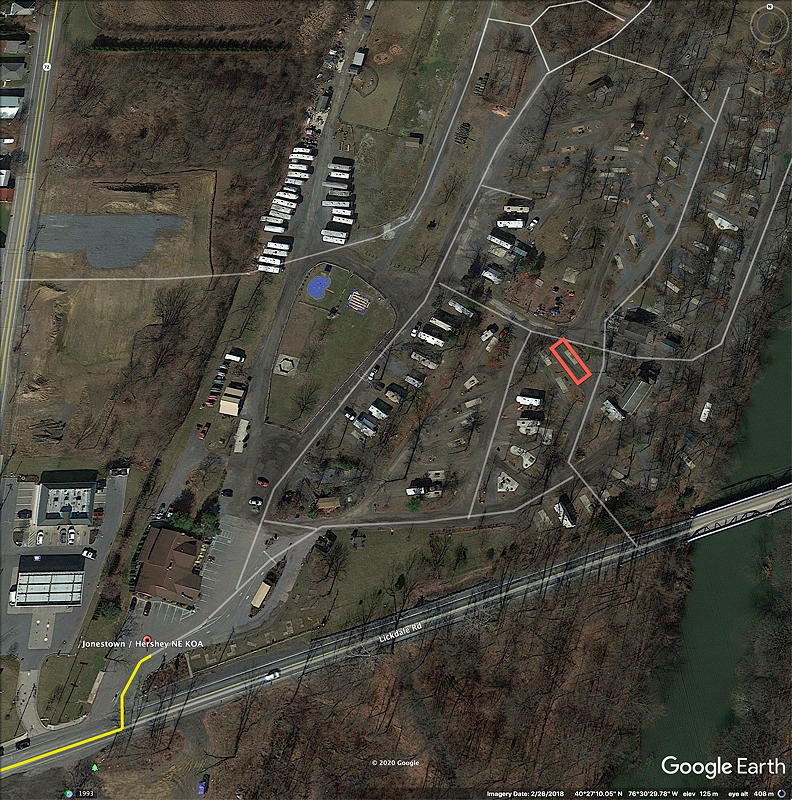
We finally arrived at our destination, the Jonestown / Hershey NE KOA campground, just after 8:00 pm. It was dark. That can be a problem when visiting campgrounds for the first time because it’s harder to translate the map guiding you to your spot to what you’re seeing with your eyes. If you arrive at a KOA before the office closes, a golf cart usually guides you to your spot. After the office closes, you’re on your own.
In our case, the office was closed, so there would be no guide to our campsite. However, we’ve been at this campground many times before. Also, as it turns out, we were going to a spot in the campground that we’d been beside before. So, it was easy to find. The satellite picture below shows the campsite we ended up in, site 48.
There was still no hint of any concerns about COVID-19 at the campground. No warning signs, or instructions to keep one’s distance from other people. Nothing at all.
Trailer Damage
It’s not that uncommon for us to open up the trailer at our destination and find that minor things have broken or detached. We’ve had a long, long list of things come up as warranty items in the first year of ownership, but we still see the occasional items. This time was no different.
Garbage Bin
Our trailer has a garbage bin that slides out from under the center island in the kitchen. The mounting rails for the slides are fastened to the surrounding cabinetry by screws. At the front of the garbage bin, the screw on one side had completely come out while the screw on the other side had unscrewed but was caught in the mounting hole in the slide. It was still holding the garbage bin up a bit at the front, but it was lower than usual and wouldn’t close unless you manually lifted it to its proper height.
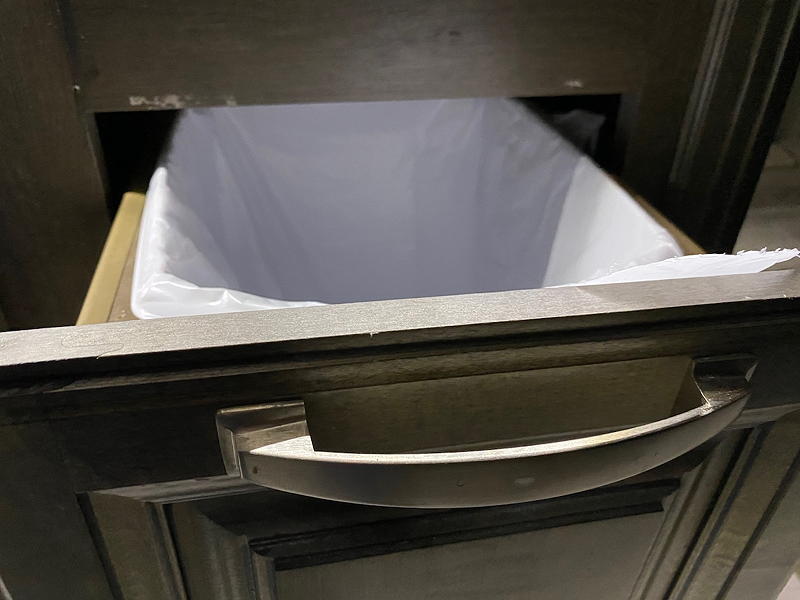
It took about a week, but I eventually fixed it myself. I had to figure out how to remove the garbage bin and its moving part of the slide from the fixed part of the slide. Then, I replaced the screws with longer screws. So far, that seems to be working.
Decorative Window Frame
All of our windows in the trailer have these very pretty decorative window frames. They’re secured at the top by brackets that extend out from the wall above the roller shades. At the bottom, they’re secured by screws that angle up into the flimsy wall. We’ve had a lot of those screws pull out. I’ve screwed them back in, but then they pull out again. However, we’d never had the top of the decorative window frame detach from its brackets. Until now.
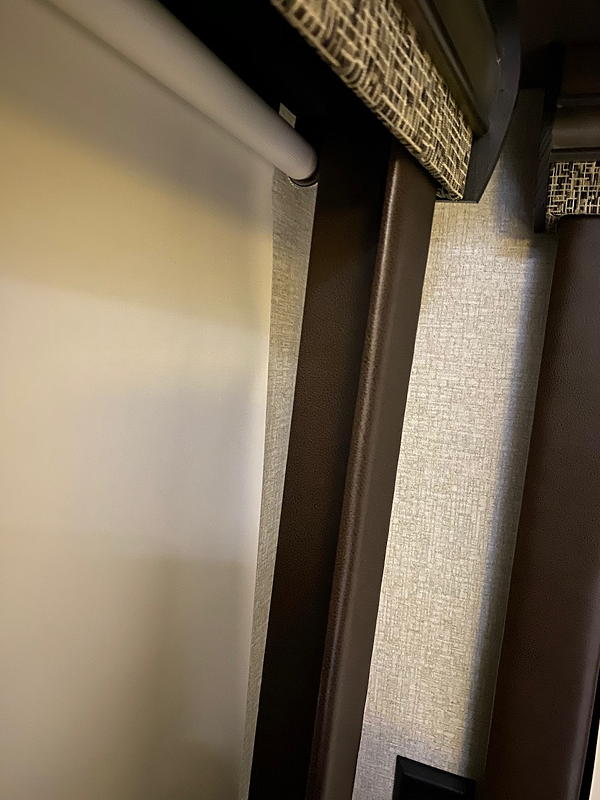
In this case, there are two screws that go through the mounting bracket holes and into the wood at the top of the decorative window frame. Somehow, they had both come out. The window frame tilted far away from the wall until it contacted one of the retracted slide-outs, stopping it from falling any further. The screws holding the bottom part of decorative window frame, however, remained in position and kept the whole frame from falling off the wall completely.
About a week later, I reattached the window frame to the brackets. At the point, I noticed that the brackets were a bit loose. I suspect I’ll be fixing that, too, soon enough. 🙂
Bedroom Slide-Out Wheel
Our bedroom slide-out at the front of our trailer has storage under the King bed. There are wheels at the two front corners. The wheel on one of those corners had collapsed, causing that corner of the slide-out to drag on the floor. It was my fault–we’d never owned a trailer before and I’d put heavy stuff in the compartment. Lesson learned–no more heavy stuff there. We’d had it repaired at the dealer but here we were, after the first trip since the repair, and it was broken again despite nothing heavy in the storage compartment this time. Sigh. I didn’t know how to fix this so it remained broken for the rest of the trip.
Mice!
One of our complaints to the dealer was that the covering at the bottom of the underbelly of the trailer was warped. It had ripples big enough for me to put my finger through. I was initially concerned about the warm air from the furnace leaking out. The furnace heats the underbelly of the trailer to keep the various water tanks and water lines from freezing in very cold weather. If a lot of the warm air leaks out, we could have our water lines freeze. But I was also worried about mice getting in. We’d never had a mice problem before we’d taken it to the dealer before this trip. Then we saw this:
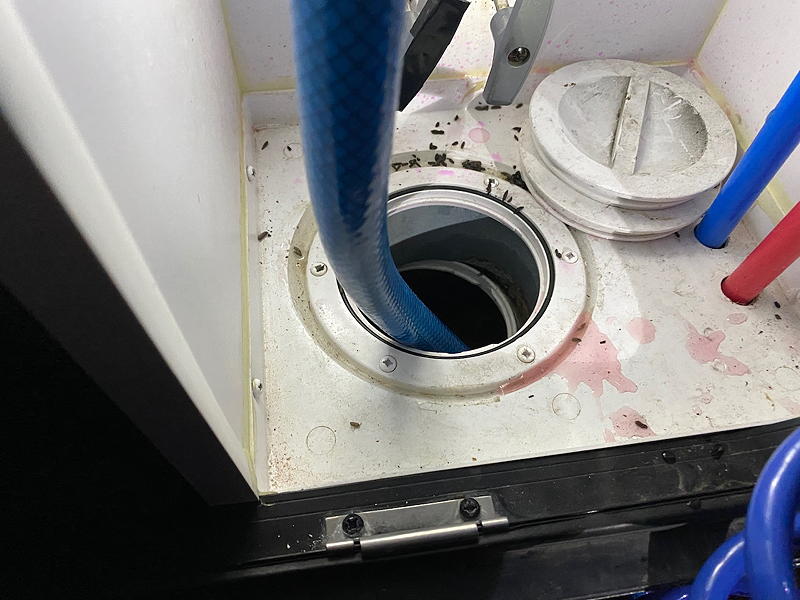
What you’re seeing here is the water compartment of our trailer. The covers of the big hole at the bottom–one for the top of the hole and one for the bottom of the hole–are sitting beside the blue and red drain lines. You can see that there’s quite a bit of mice poop there. So, we’ve clearly had mice in this part of the trailer. Fortunately, we didn’t see any elsewhere in the trailer. However, we remain vigilant.
With the trailer all set up for the night, I took the truck to the gas station beside the campground and filled it up with diesel so that we’d be ready to go the next day. With that, we both went to bed to be ready for the next leg of the journey tomorrow.
Join us for the next let of our journey in Part 3!
This posting was made public on March 21, 2020.
Change History
| April 4, 2020 | Added maps of the route we took along with highlights along the way, all from Google Earth Pro. |
| March 22, 2020 | Moved a picture and a traffic jam description to the next day when they actually occurred. |
Recent Comments